Configure IAM Roles and Policies
To ensure our CI/CD pipeline can securely interact with Amazon ECR, we need to configure the appropriate access permissions in AWS IAM. This step involves creating an ECR Repository if one doesn’t already exist, then creating an IAM User and assigning the necessary policies.
Objectives of this section
- Create the
fcj-workshop-appECR Repository if it doesn’t already exist. - Retrieve the ECR Repository URI.
- Create an IAM User with ECR access.
- Attach the necessary IAM policies to the IAM User.
Create and Retrieve ECR Repository URI
We need an ECR Repository to store our container images. If you haven’t created it in the “Preparation” section, follow these steps. Afterward, we will retrieve this repository’s URI.
Log in to the AWS Console: Go to https://aws.amazon.com/console/ and sign in.
Navigate to the ECR service: In the search bar, type “ECR” and select Elastic Container Registry.

Check and Create Repository:
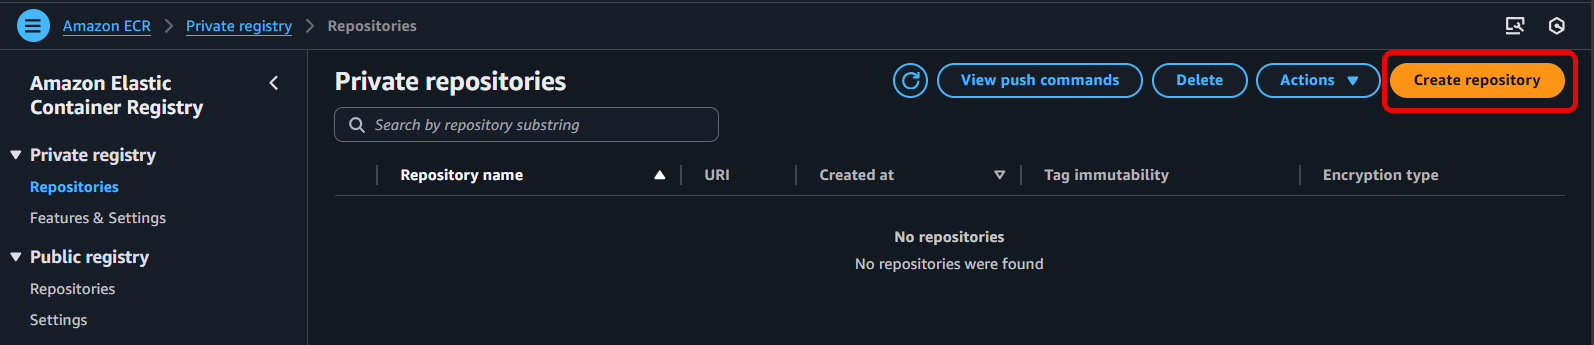
- In the ECR dashboard, select Repositories in the left navigation pane.
- If you DO NOT have a repository named
fcj-workshop-appyet, follow these steps to create one:- Click the Create repository button.
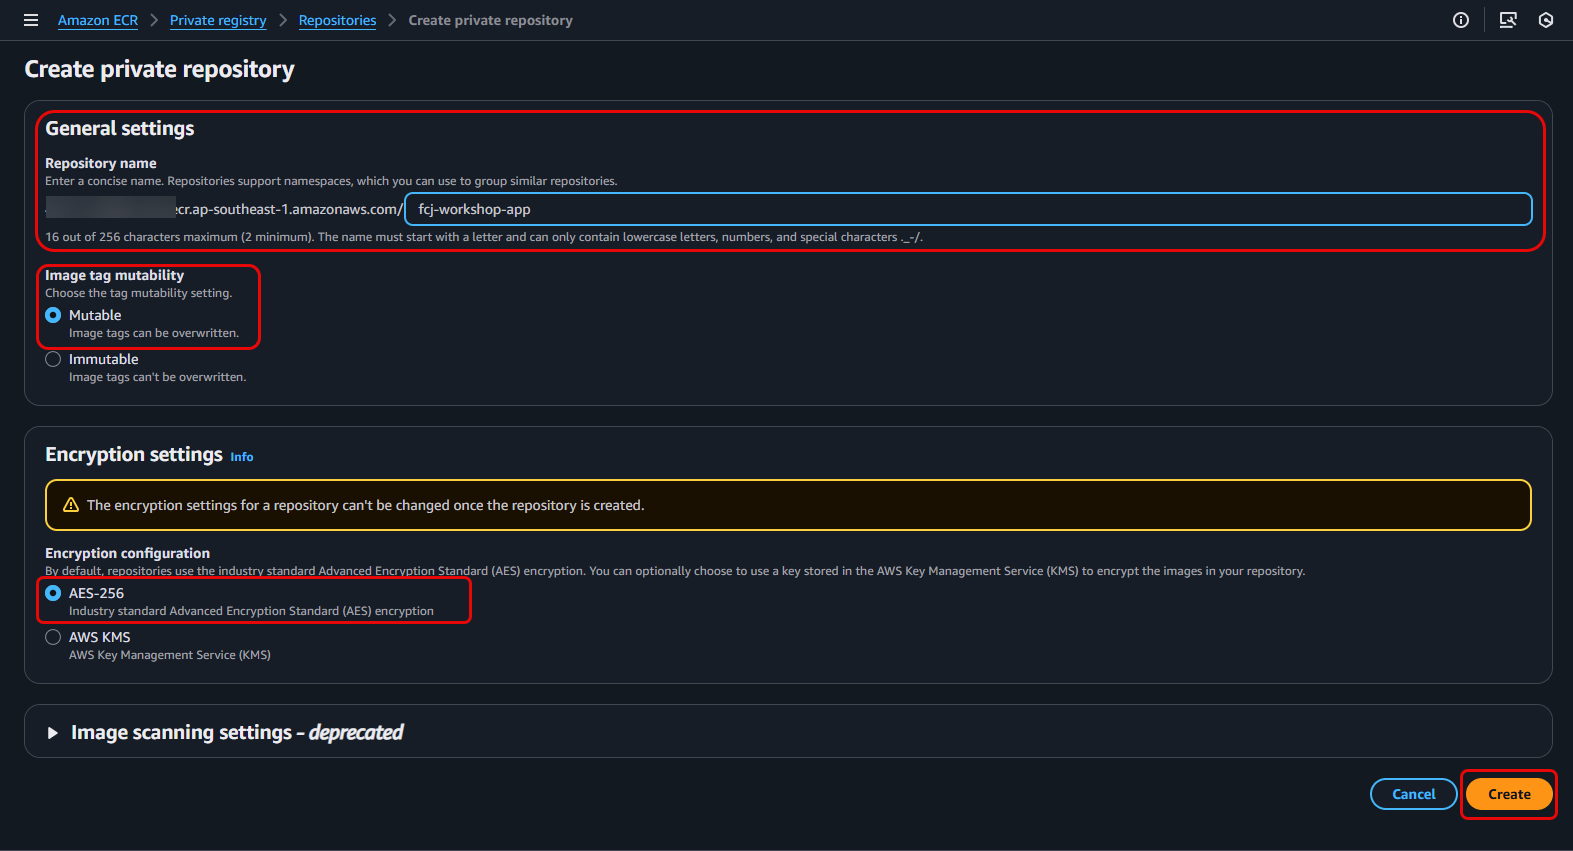
- For Visibility settings, choose Private.
- In the Repository name field, enter
fcj-workshop-app. - Click the Create repository button at the bottom of the page.
- If you ALREADY HAVE the
fcj-workshop-apprepository from the preparation section, proceed to the next step.
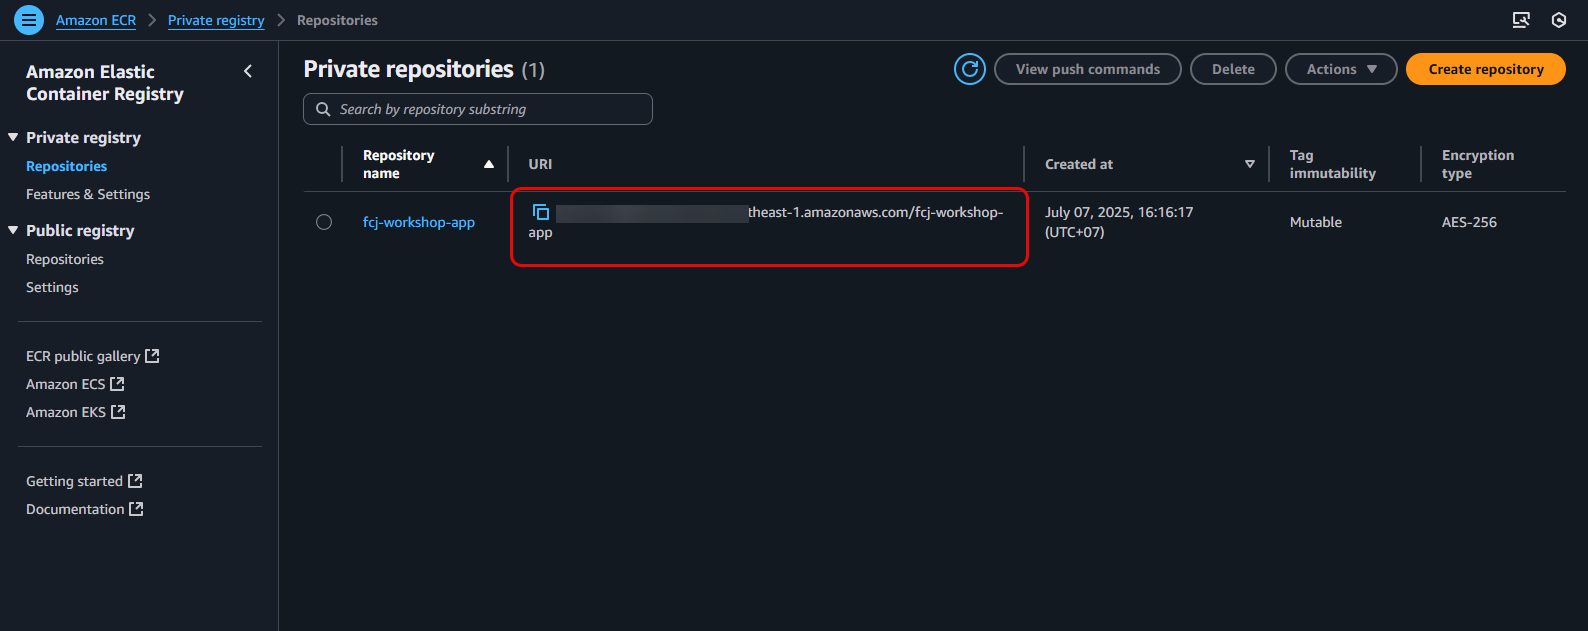
Select your Repository and Copy the URI:
- From the list of repositories, find and click on the
fcj-workshop-apprepository name. - On the repository details page, you will see the repository URI. Copy this URI. It will be similar to:
123456789012.dkr.ecr.ap-southeast-1.amazonaws.com/fcj-workshop-app(where123456789012is your AWS account ID andap-southeast-1is your Region).
Keep this URI handy. We will need to use it in later GitHub Actions configuration steps to specify the repository where the image will be pushed.- From the list of repositories, find and click on the
Create IAM Policy for ECR Access
Instead of using a pre-existing policy, we will create a custom IAM Policy via the console to gain more granular control over the permissions the CI/CD user will have on ECR.
Navigate to the IAM service: In the AWS Console search bar, type “IAM” and select IAM.

Create a new Policy:
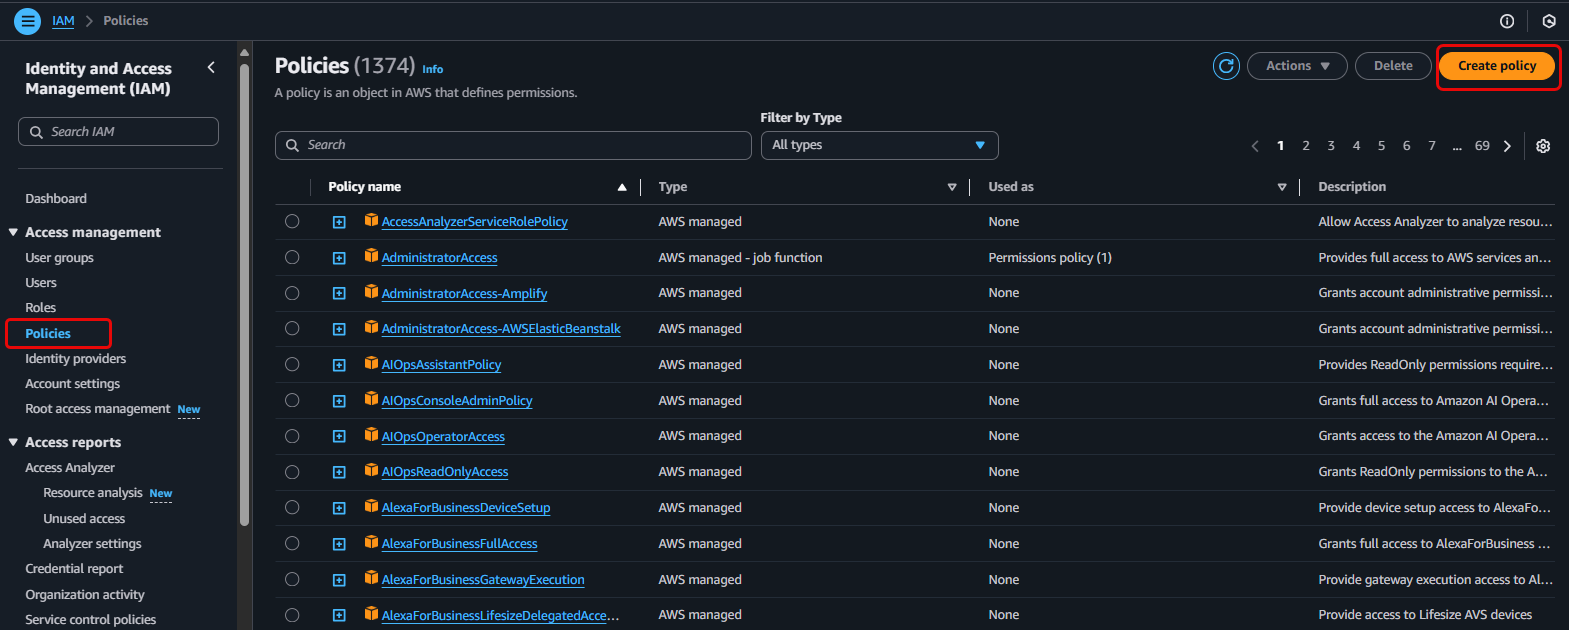
- In the IAM dashboard, select Policies in the left navigation pane.
- Click the Create policy button.
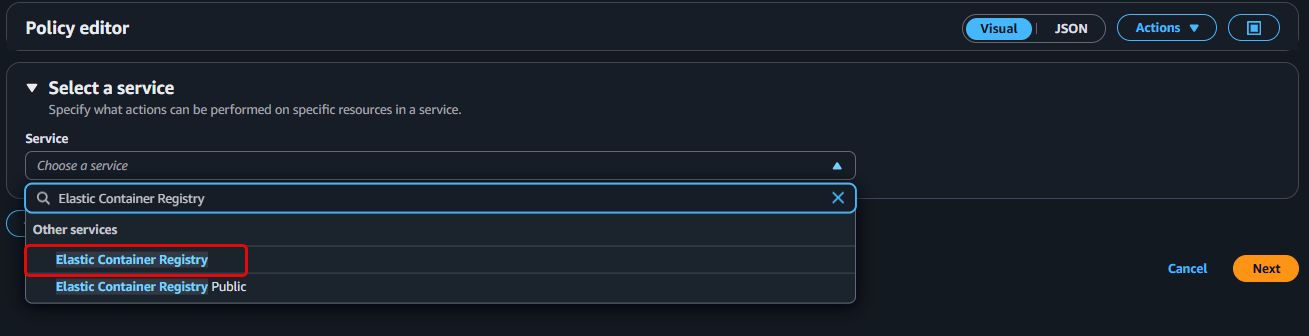
Choose service and actions:
- On the Specify permissions page, select the Visual editor tab.
- For Service, search for and select Elastic Container Registry.
- In the Actions allowed section, expand Write and select the following actions:
CompleteLayerUploadInitiateLayerUploadPutImageUploadLayerPart
- Expand Read and select the following actions:
BatchCheckLayerAvailabilityBatchGetImageDescribeImagesGetDownloadUrlForLayer
- In the additional Access level section, find and select the
GetAuthorizationTokenaction.
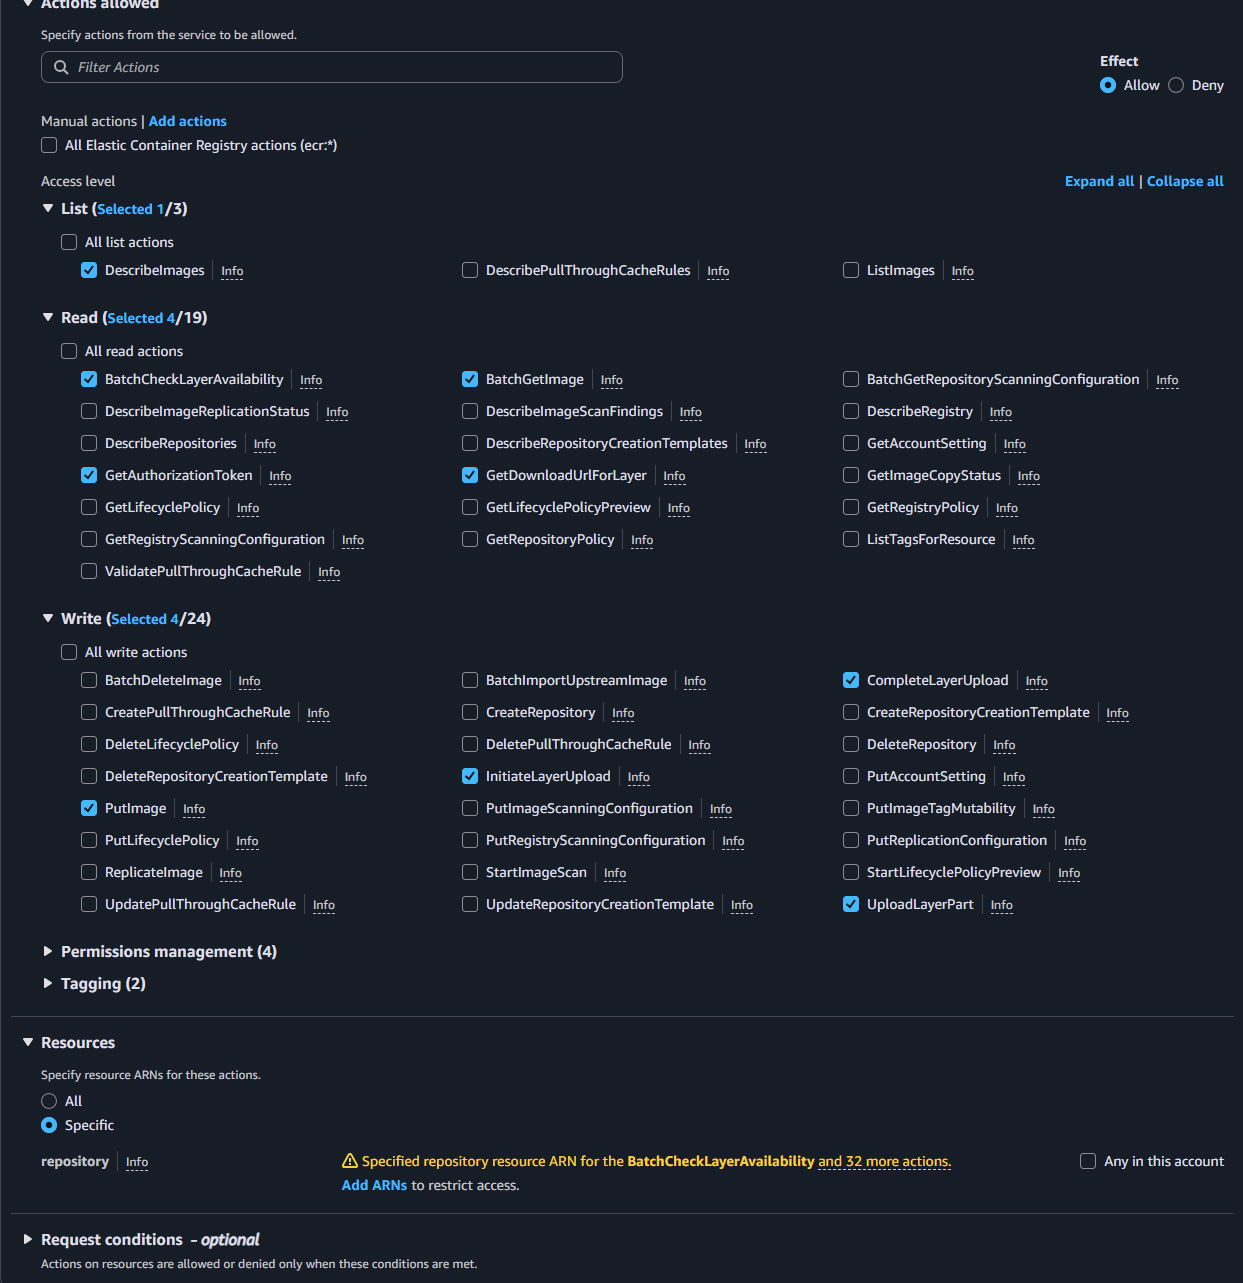
- In the Resources section, choose Specific.
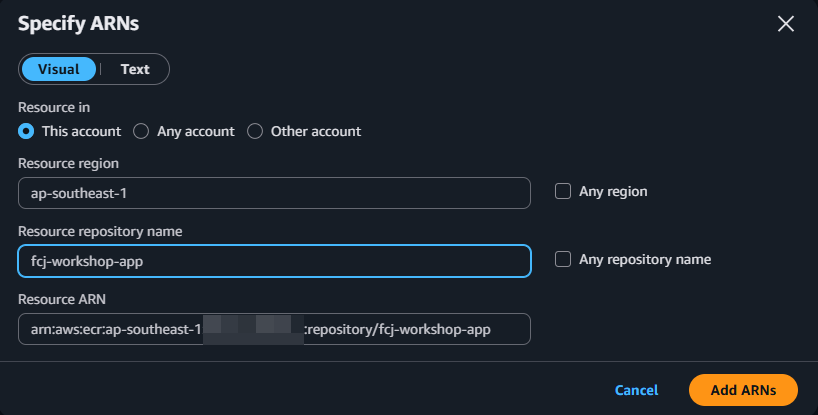
- For repository, click Add ARN.
- Enter the following information:
- Region: Select your AWS Region (e.g.,
ap-southeast-1). - Account ID: Enter your AWS account ID.
- Repository name: Enter
fcj-workshop-app.
- Region: Select your AWS Region (e.g.,
- Click Add ARN.
- For the
GetAuthorizationTokenresource (if this option is separate), leave it as Any or add a separate line for this action withResource: *if necessary. (Typically,GetAuthorizationTokenis not restricted to a specific repository resource but rather by account/region).
The selected permissions (`ecr:*` for specific actions) allow the user to perform image push and pull operations.
`ecr:GetAuthorizationToken`: Allows the user to obtain an authentication token to log Docker into ECR.
`Resource`: We specify that this policy applies only to your `fcj-workshop-app` repository, adhering to the principle of least privilege.
Add Tags (Optional): You can add tags for easier management. Click Next: Review policy.
Review and Create Policy:
- For Policy name, enter
fcj-ecr-ci-cd-policy. - (Optional) Enter a Description. Enter
policy for CI-CD. - Click the Create policy button.
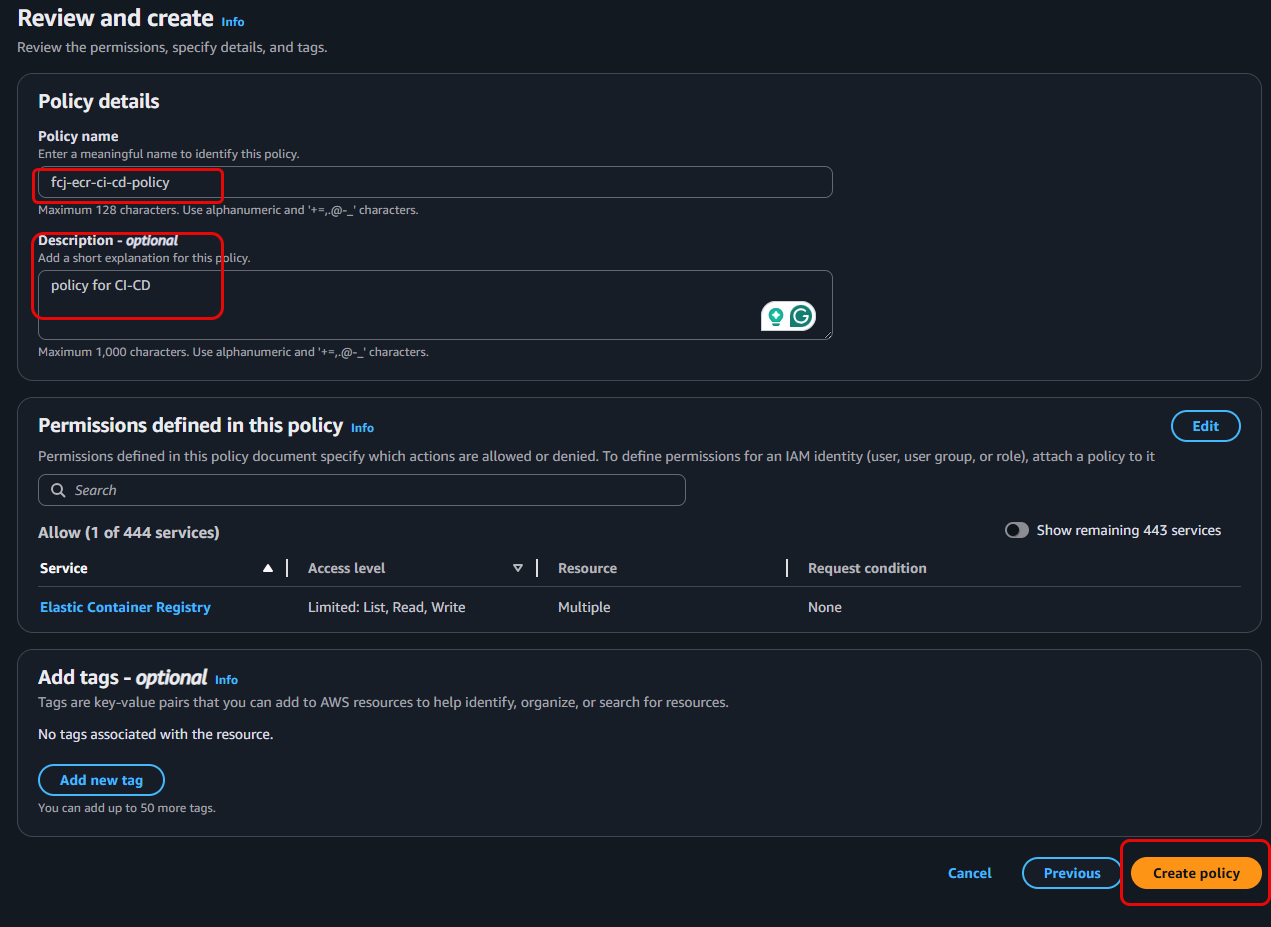
Creating a custom policy like this allows you more precise control over the permissions granted to a user or role. This is a better practice than assigning broader managed policies for CI/CD purposes.- For Policy name, enter
Create IAM User and Attach Policy for CI/CD
Now we will create an IAM User and attach the custom policy fcj-ecr-ci-cd-policy we just created to this user.
Navigate to the IAM service: Ensure you are in the IAM dashboard.
Create a new User:
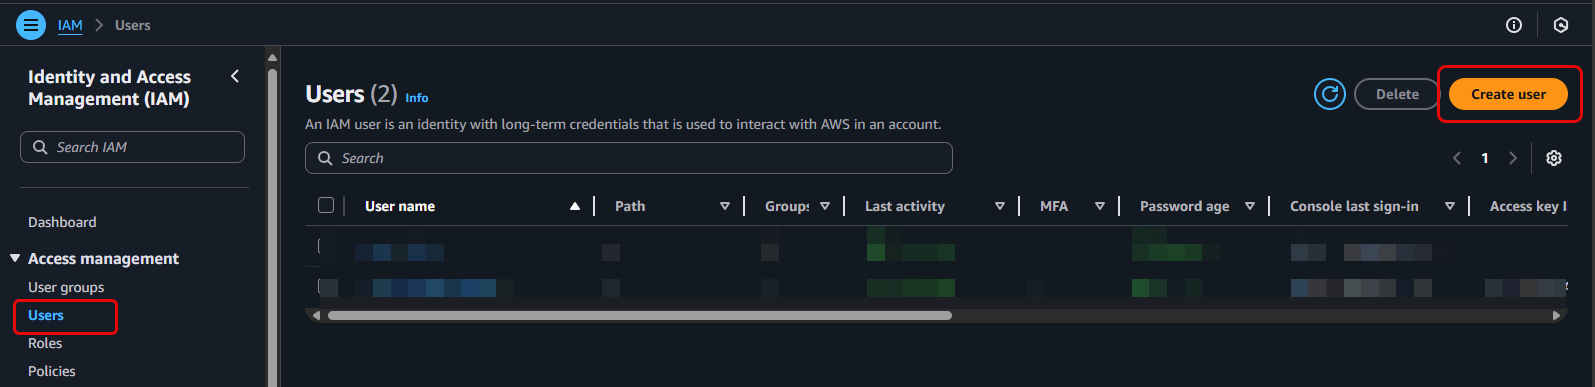
- In the IAM dashboard, select Users in the left navigation pane.
- Click the Create user button.
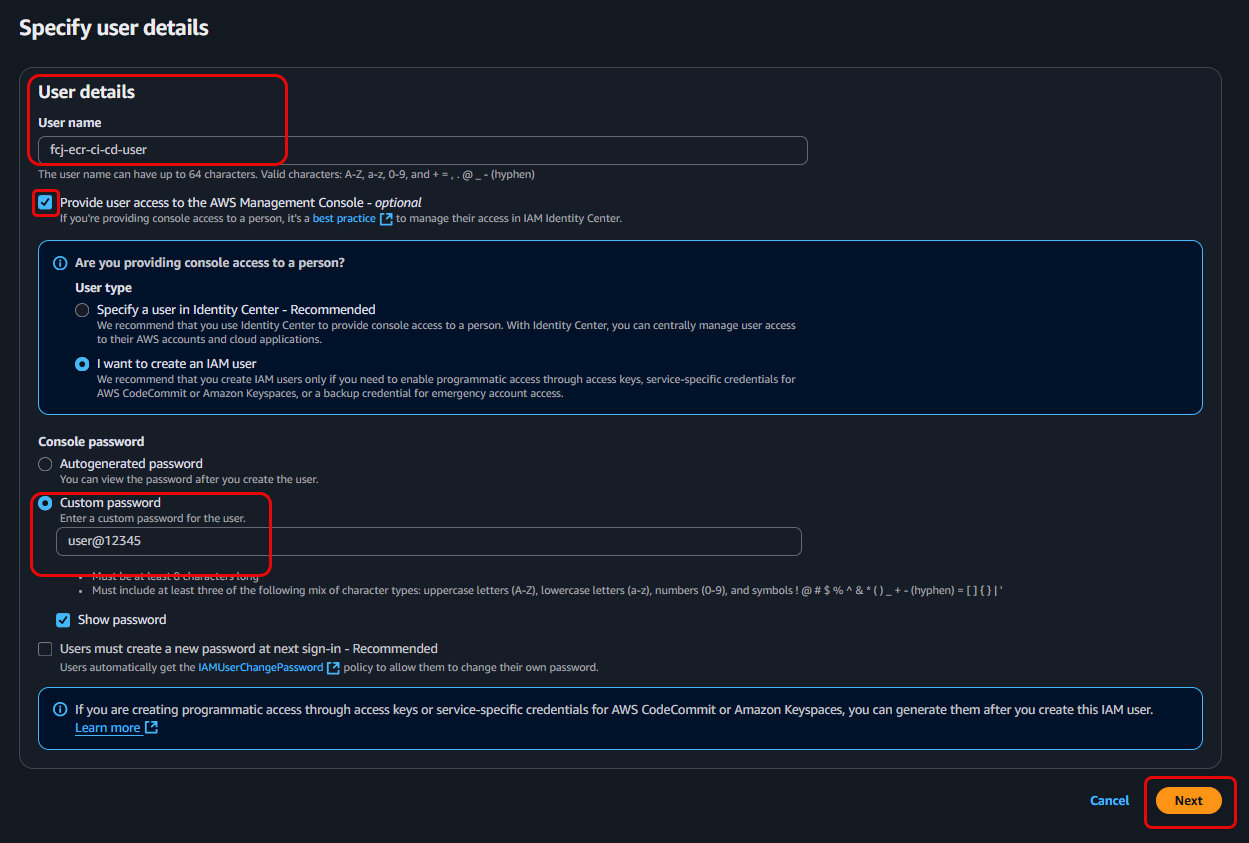
- For User name, enter
fcj-ecr-ci-cd-user. - Choose Provide user access to the AWS Management Console for the CI/CD user.
- Click Next.
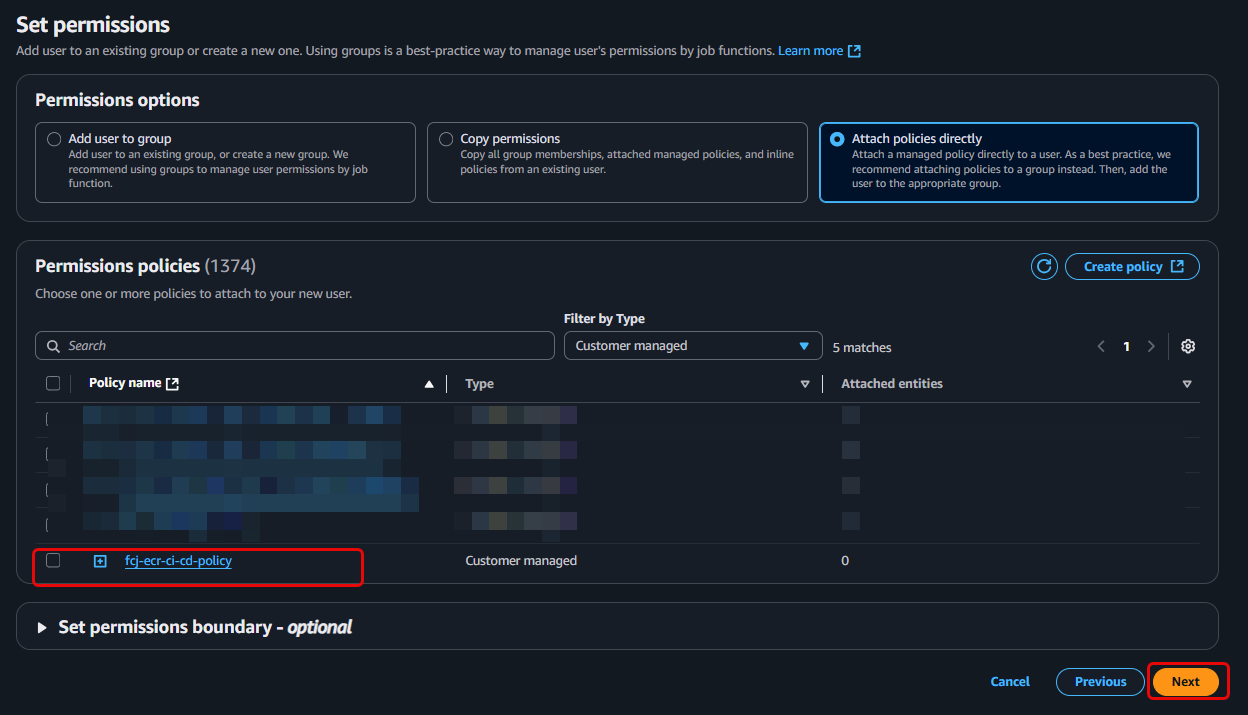
Set permissions:
- On the Set permissions page, select Attach policies directly.
- In the search box, type
fcj-ecr-ci-cd-policy(the name of the policy you just created) and select this policy. - Click Next.
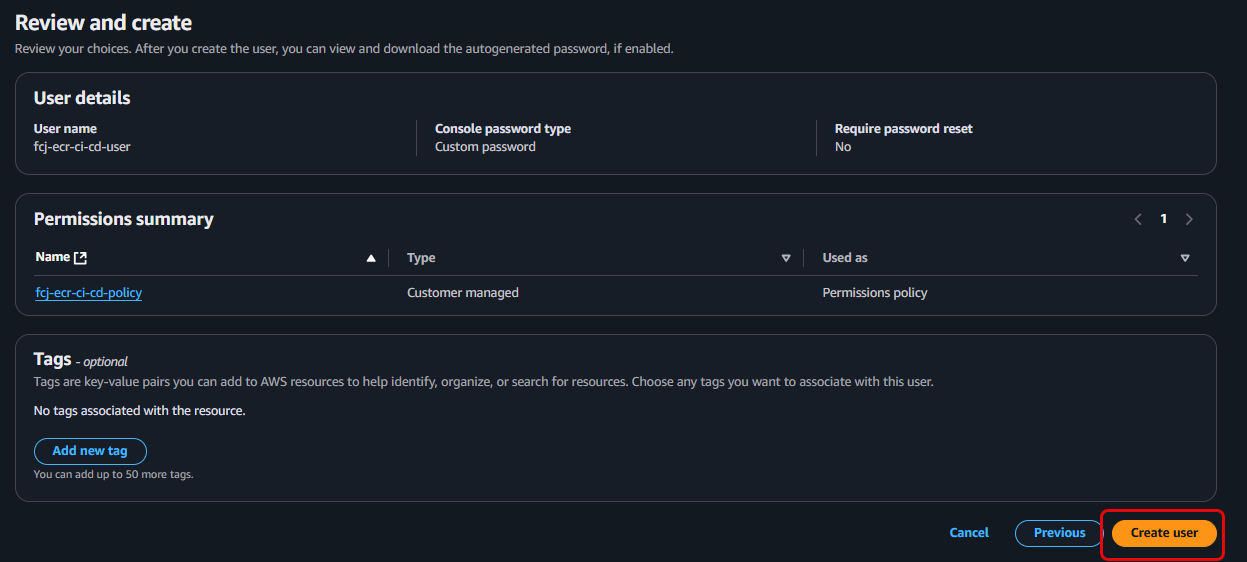
Review and Create User:
- On the Review and create page, review the settings.
- Click the Create user button.
Save Access Key:
- After the user is created, you will see a success message. Click View user or go back to the user list and click on the
fcj-ecr-ci-cd-useryou just created. - Navigate to the Security credentials tab.
- In the Access keys section, click Create access key.
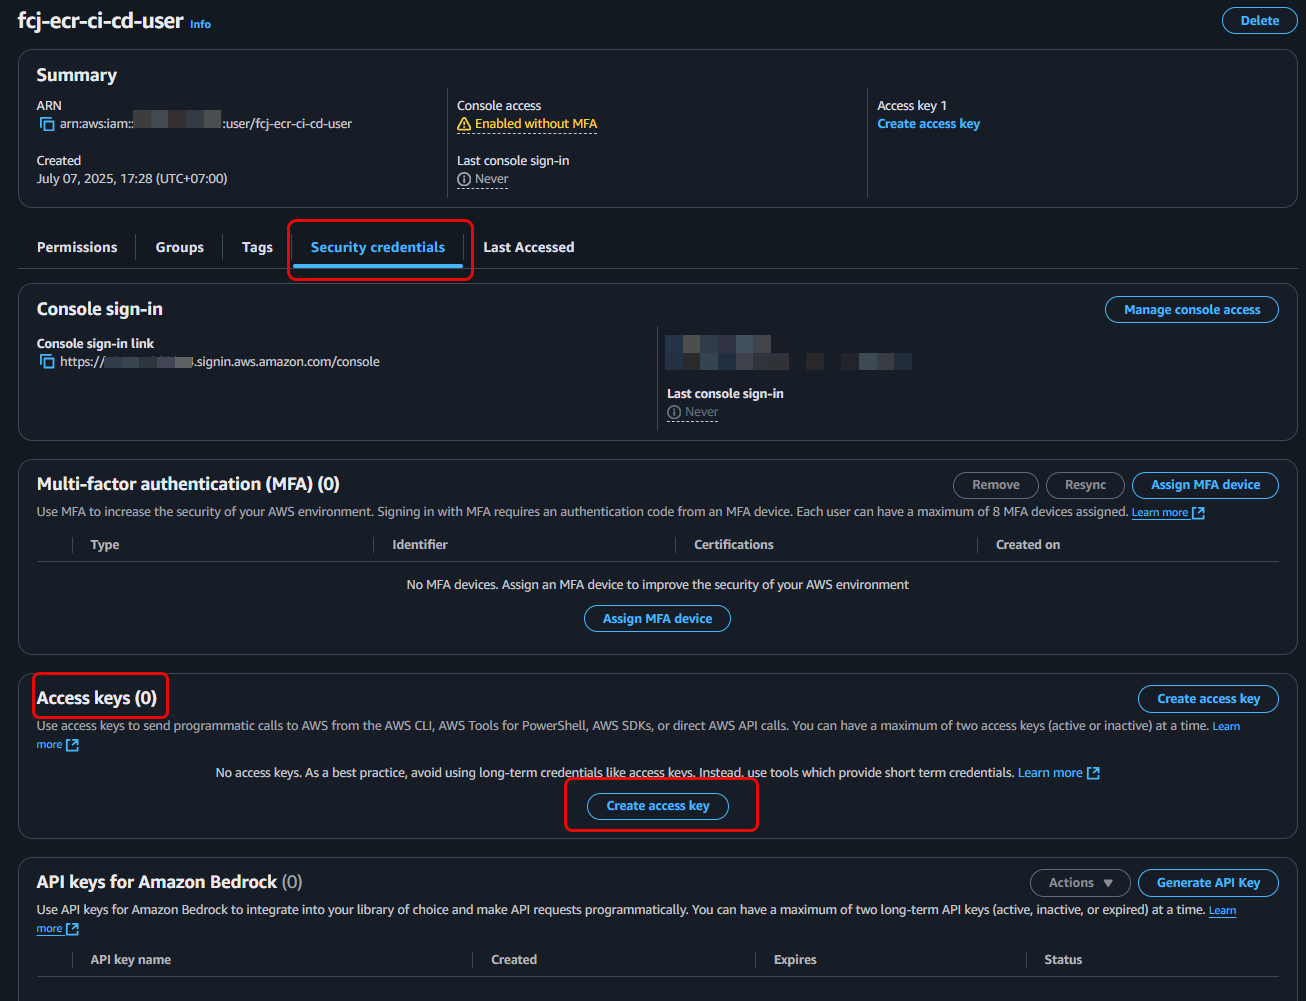
- After the user is created, you will see a success message. Click View user or go back to the user list and click on the
Choose Third-party service as the use case.
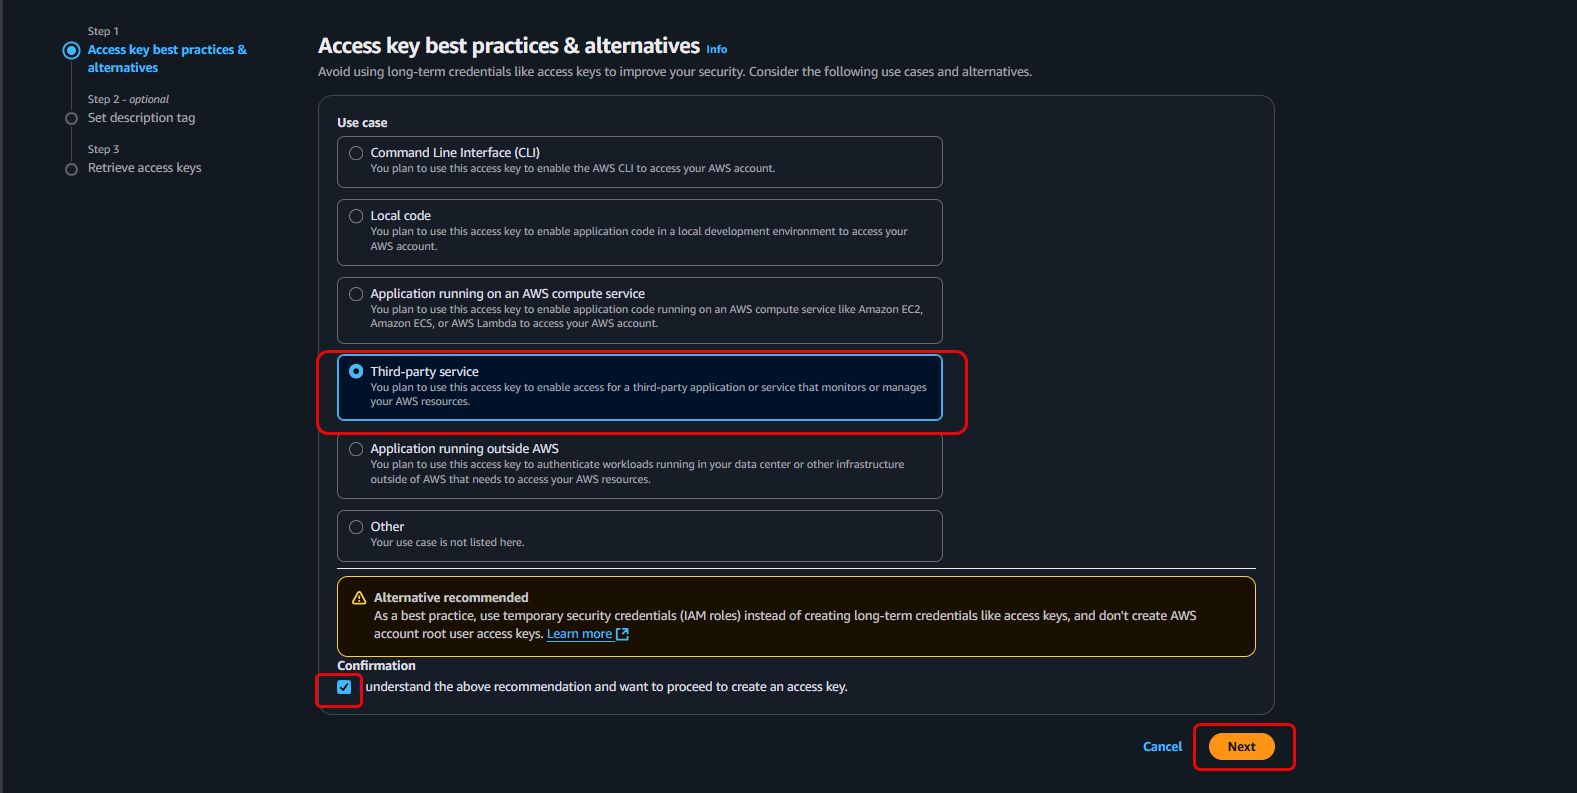
- Check the confirmation box and click Next.
(Optional) Enter a description for the Access Key (e.g.,
for-github-actions).- Click Done.
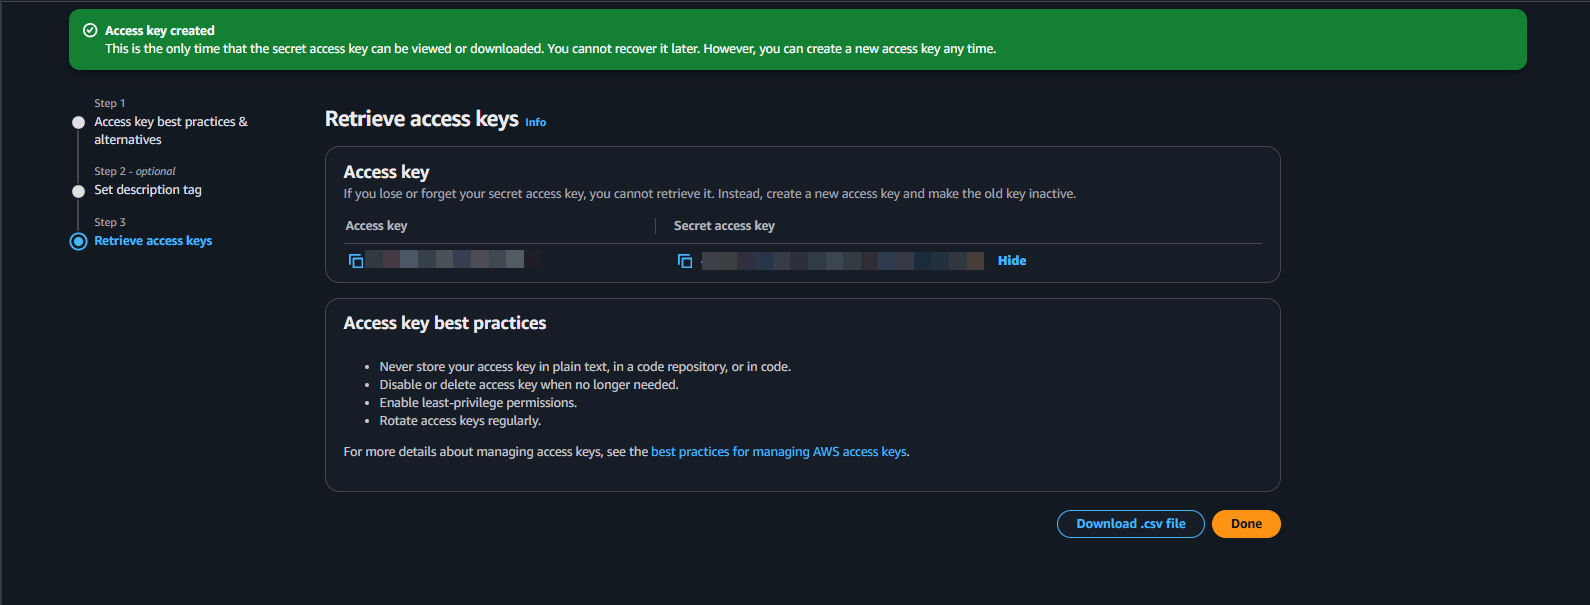
The Secret Access Key is displayed ONLY ONCE immediately after creation. Make sure you copy both the Access Key ID and Secret Access Key and store them in a secure place. You will not be able to view this Secret Access Key again after closing this window. We will need to use them to configure GitHub Actions in later sections.
In a real production environment, using an IAM Role with OpenID Connect (OIDC) is the more recommended method for granting permissions to CI/CD. This approach avoids the need to store long-lived Access Keys, enhancing security. However, for simplicity in this workshop, we will use Access Keys.