Run and Test the Pipeline
Now that you have configured GitHub Repository Secrets and understood the GitHub Actions Workflow, we will trigger the CI/CD pipeline to verify that everything is working as expected.
Objectives of this section
- Trigger the CI/CD pipeline by pushing changes to GitHub.
- Monitor the workflow run on the GitHub Actions interface.
- Verify the results: check for the newly created Git tag and the Docker image on Amazon ECR.
Triggering the CI/CD Pipeline
Your CI/CD pipeline is configured to automatically run every time code is pushed to the main branch. To trigger the pipeline, we will make a small change and push it to the repository.
Make a small change:
- Open the
aws-container-security-workshopproject folder on your local machine. - Open the file
fcj\src\static\js\app.js(or any other file, e.g., add a comment to a source code file). - Add the text
v1.0.0to line 56 in thesrc\static\js\app.jsfile. - Save the file.

- Open the
Push changes to GitHub:
- Open Terminal/Command Prompt (ensure you are in the project directory).
- Add the changes to the staging area:
git add . - Create a commit with a clear message:
git commit -m "Trigger CI/CD pipeline for testing" - Push this commit to the
mainbranch of your GitHub repository:git push origin main
Immediately after you push code to the
mainbranch, GitHub Actions will automatically detect the change and start running theCI/CD Pipelineworkflow you configured.
Monitoring the Pipeline Run
Now, navigate to GitHub and monitor the pipeline’s progress.
Access GitHub Actions:
- Open your browser and navigate to your repository on GitHub.
- Click on the Actions tab.

View Workflow Status:
- You will see a workflow named
CI/CD Pipelinewith anIn progressorQueuedstatus. - Click on the name of the workflow that just ran (based on the commit message you just created) to view details.

- You will see a workflow named
Check Job Steps:
- On the workflow details page, you will see the
build-and-pushjob. Click on it to see the specific steps being executed. - Monitor the output logs of each step to ensure they complete successfully. You will see steps like
checkout,configure aws credentials,login to amazon ECR,Automatic Tagging of Releases, andbuild, tag, and push the image to ECRrunning sequentially. - Ensure that all steps have a green checkmark (success). If any step fails, review the logs to identify the cause of the error.

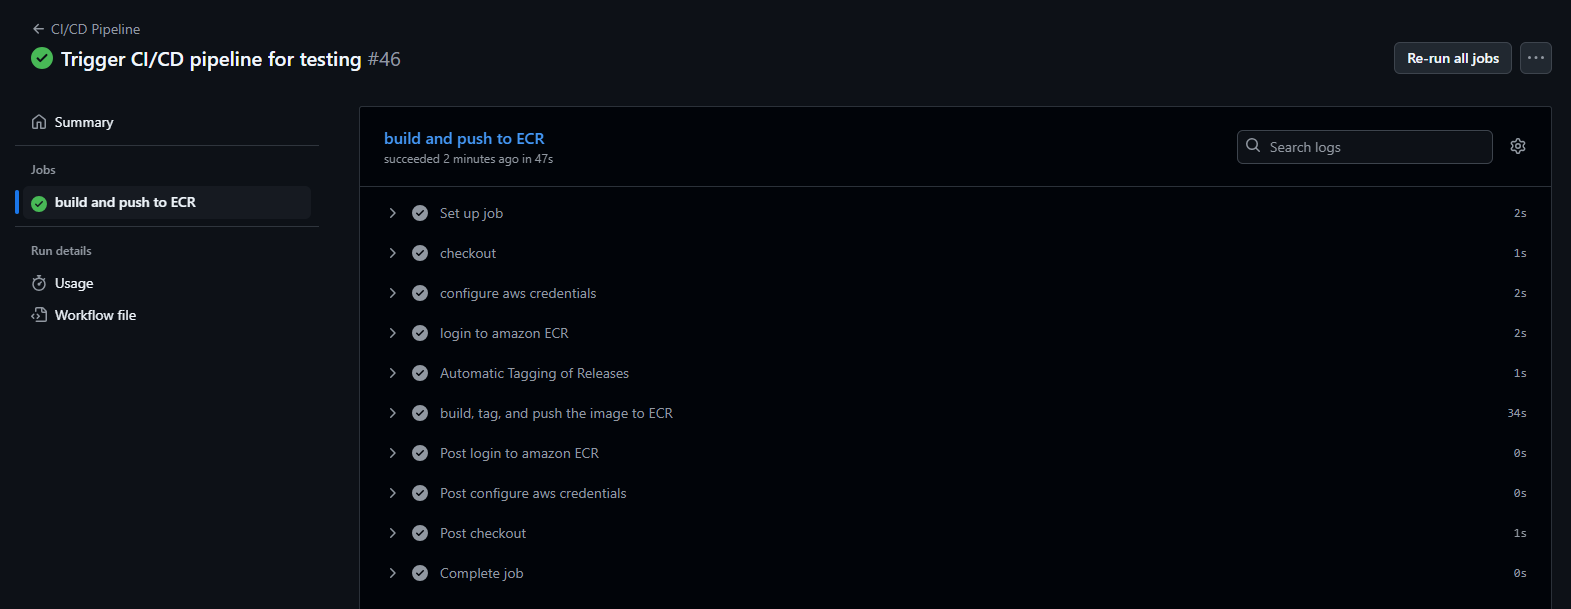
- On the workflow details page, you will see the
Verifying Pipeline Results
After the workflow successfully completes, we need to verify that the expected results have been generated.
- Check New Git Tag on GitHub:
- Return to the main page of your repository on GitHub.
- Click on “Tags” or “Releases” (usually located in the right sidebar or under the “Code” section).
- You should see a new Git tag created with an incremented version (e.g., `v0.0.1