ECR Image Lifecycle Management
Security and cost management are two critical factors when working with Docker images in Amazon ECR. By default, ECR retains all your image versions indefinitely, which can lead to an accumulation of unnecessary old images, increasing storage costs and making the repository cluttered.
ECR Lifecycle Policies allow you to automatically manage these images. You can configure rules to delete images based on age, tag status (tagged/untagged), or image count. This helps you maintain clean ECR repositories, keeping only necessary images and optimizing costs.
Objectives of this section
- Understand the importance of lifecycle management for Docker images.
- Create and configure ECR lifecycle policies to automatically clean up old images.
- Understand how lifecycle rules work and their impact on your images.
Overview of Lifecycle Policies in ECR
A lifecycle policy consists of one or more rules. Each rule defines an action (typically deletion) based on specific criteria. Common criteria include:
- Age: Delete images older than a certain number of days.
- Count: Retain the N most recent images and delete older ones.
- Tag Status: Delete untagged images or images with specific tags.
Rules are enforced according to the Rule Priority you define.
Configuring Lifecycle Policies in ECR
Now we will create a lifecycle policy for our fcj-workshop-app repository.
Ensure you are in the ECR dashboard:
- In the AWS Console search bar, type “ECR” and select Elastic Container Registry.

- In the AWS Console search bar, type “ECR” and select Elastic Container Registry.
Select the
fcj-workshop-appRepository:- From the list of repositories, click on the name of your
fcj-workshop-apprepository.
- From the list of repositories, click on the name of your
Navigate to the “Lifecycle policy” tab:
- On the
fcj-workshop-apprepository details page, click the Lifecycle policy tab.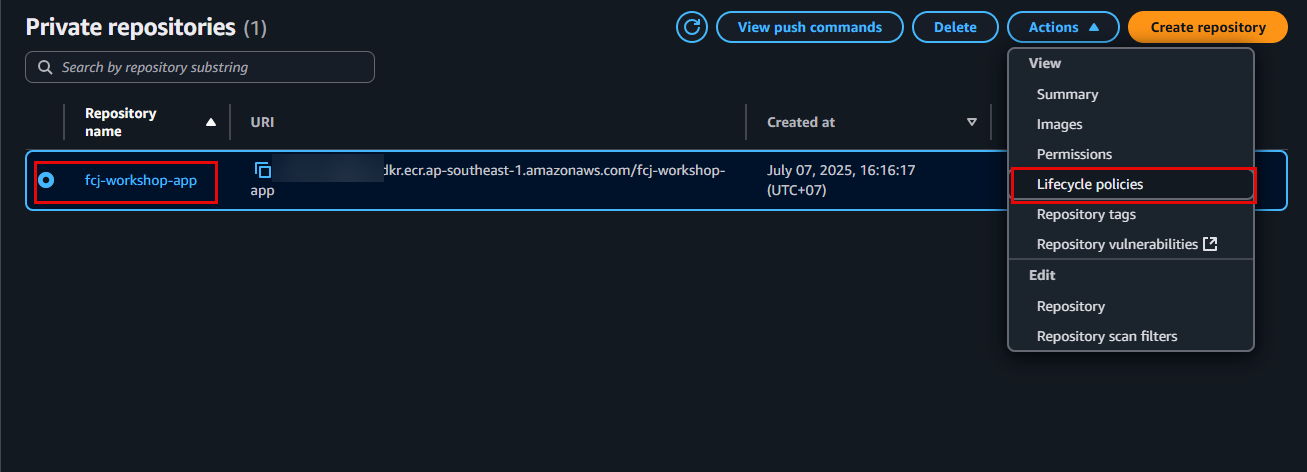
- On the
Click the “Create rule” button:
- On the “Lifecycle policy” tab, you will see the Create rule button. Click it to start defining rules for the policy.
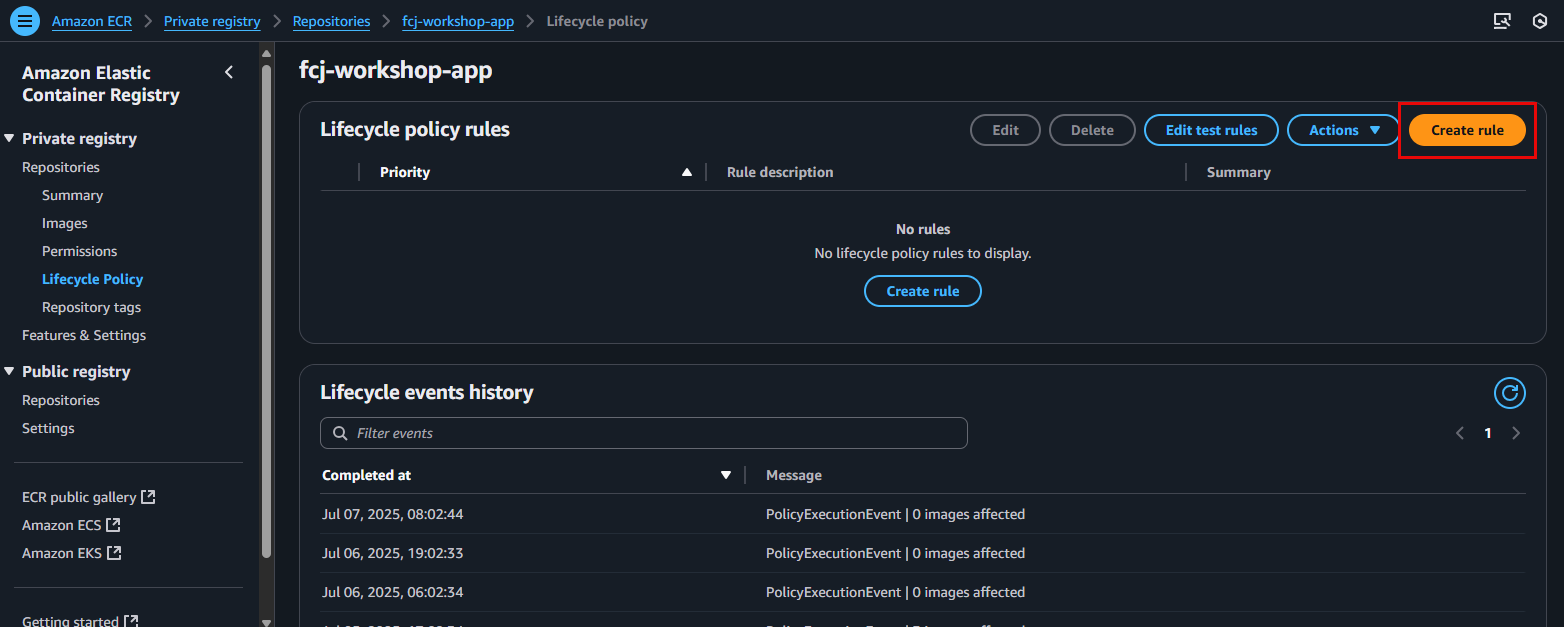
Before applying the policy, it is recommended to create and test the rule (test rule) to preview which images will be deleted. This helps you avoid unintended data loss.
- On the “Lifecycle policy” tab, you will see the Create rule button. Click it to start defining rules for the policy.
Configure the first rule: Delete Untagged Images:
- Add a new rule with the following settings:
- Rule priority:
1(Highest priority) - Rule description:
Delete untagged images - Image status:
Untagged - Action:
Expire images - Since image pushed:
1(day)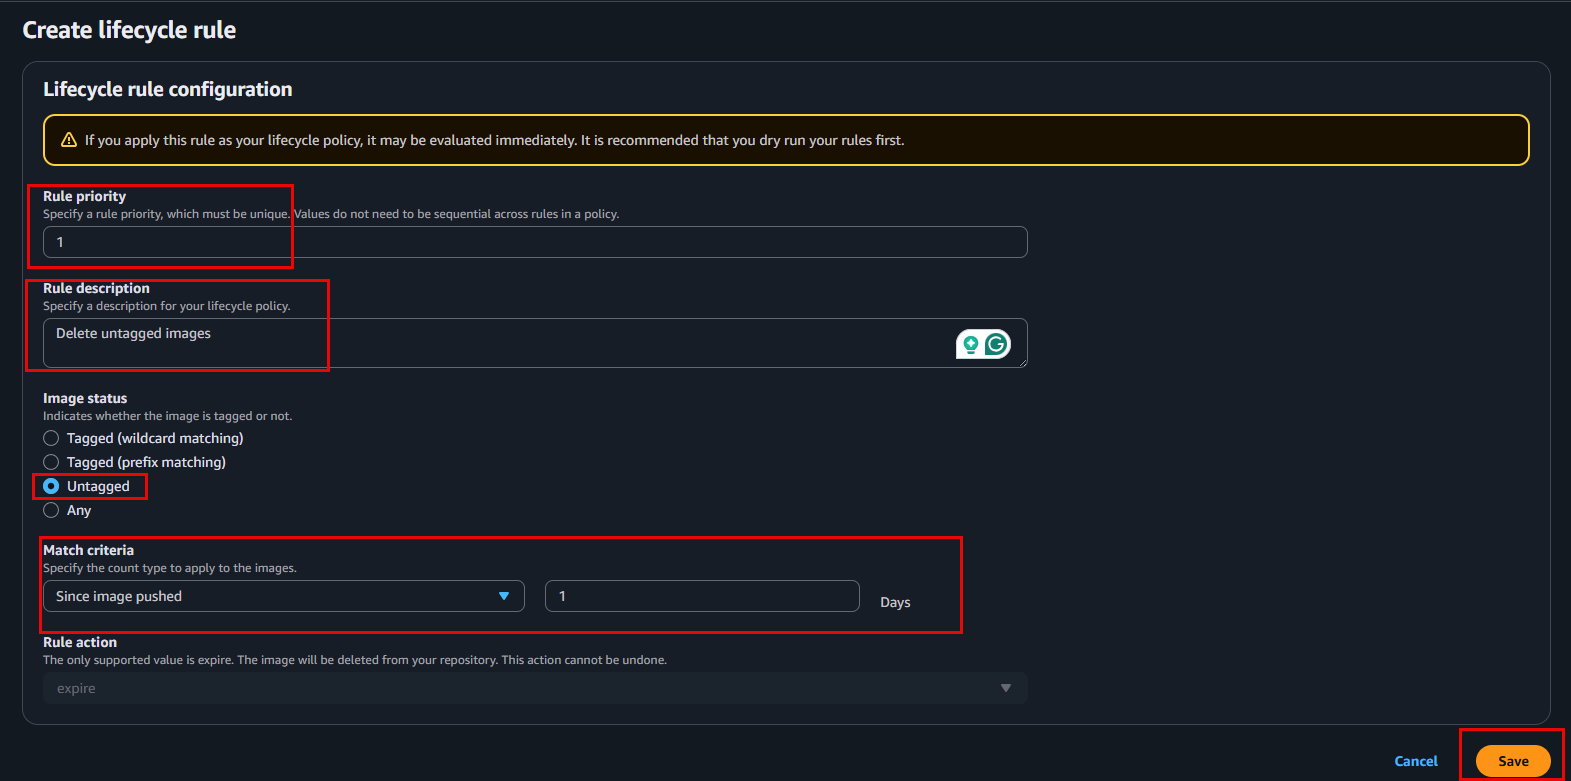
- Rule priority:
- Add a new rule with the following settings:
Configure Rule 2: Keep the 3 most recent tagged images and delete older ones:
- Click “Create rule” again and configure the second rule with the following settings:
- Rule priority:
2 - Rule description:
Keep latest 3 tagged images, delete others - Image status:
Tagged - Specify tags for wildcard matching: Enter
*(This is a REQUIRED wildcard character for the rule to apply to ALL tagged images when using the “Image count greater than” criteria. ECR requires you to enter at least one tag pattern.) - Match criteria:
Image count greater than - Value:
3 - Action:
Expire images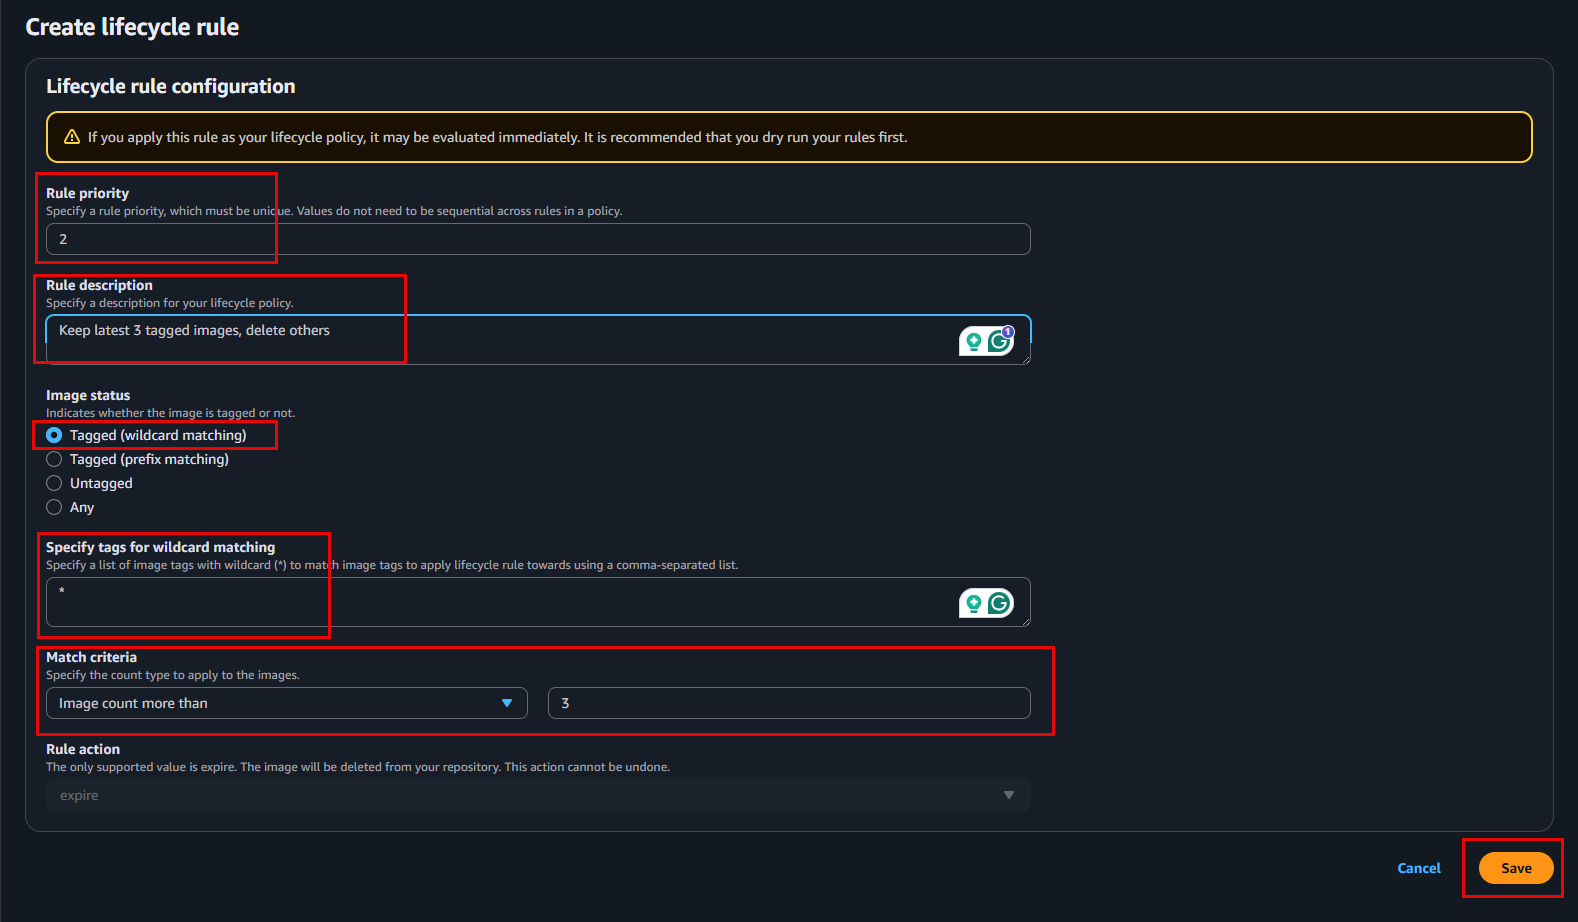
- Rule priority:
Once all rules for the policy have been defined, you should simulate the policy to preview its impact before officially creating it.
- Click “Create rule” again and configure the second rule with the following settings:
Push More Images to the Repository to Test the Policy:
- To have enough data for the lifecycle policy to operate and for you to see clear simulation results, repeat the steps for pushing images to the ECR repository (as done in Section 4.3. Run and test Pipeline).
- You should push approximately 5 new images with different tags (e.g.,
v0.0.2,v0.0.3,v0.0.4,v0.0.5,v0.0.6). Ensure each push is a new version to create distinct images.
Simulate policy to preview its impact:
- After defining all rules for the policy, you should run a simulation to see which images will be affected (deleted) before actual application. On the policy creation interface:
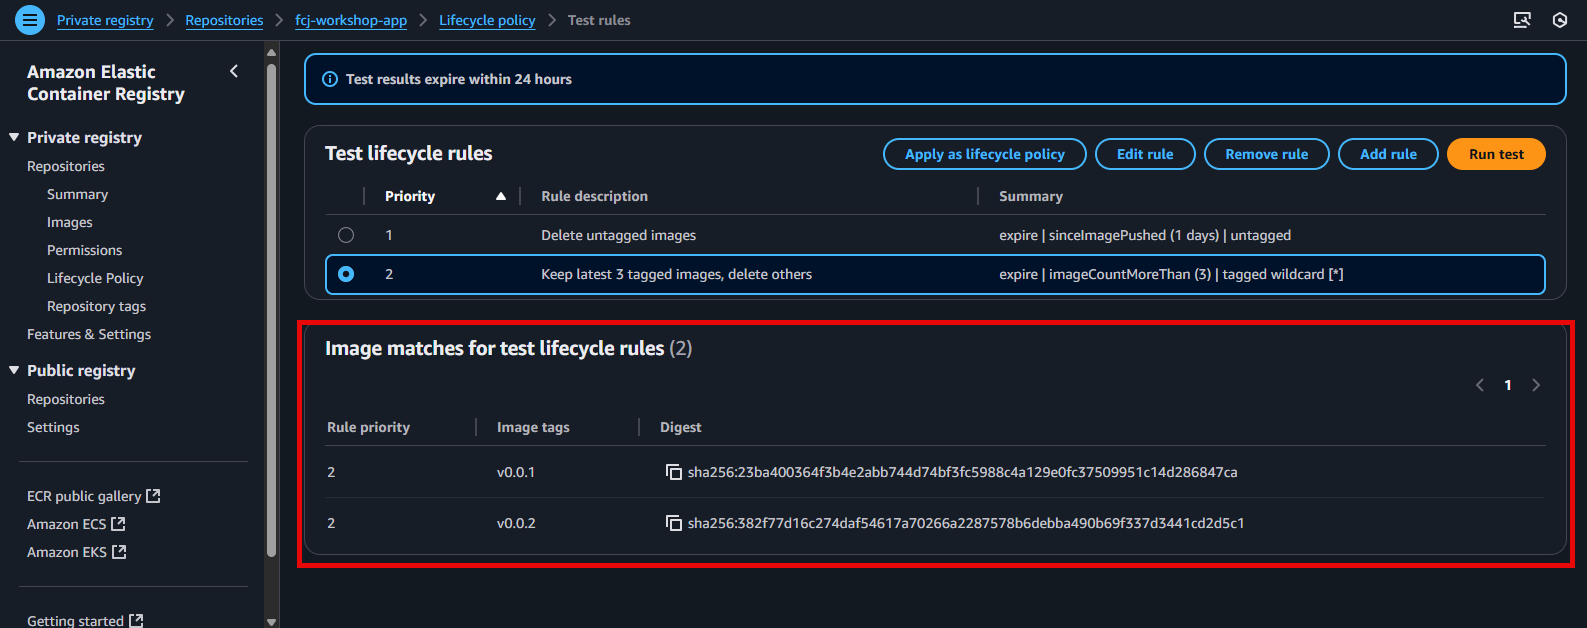
- The simulation results will show a list of images that would be deleted if this policy were executed. This helps you avoid accidentally deleting important images.
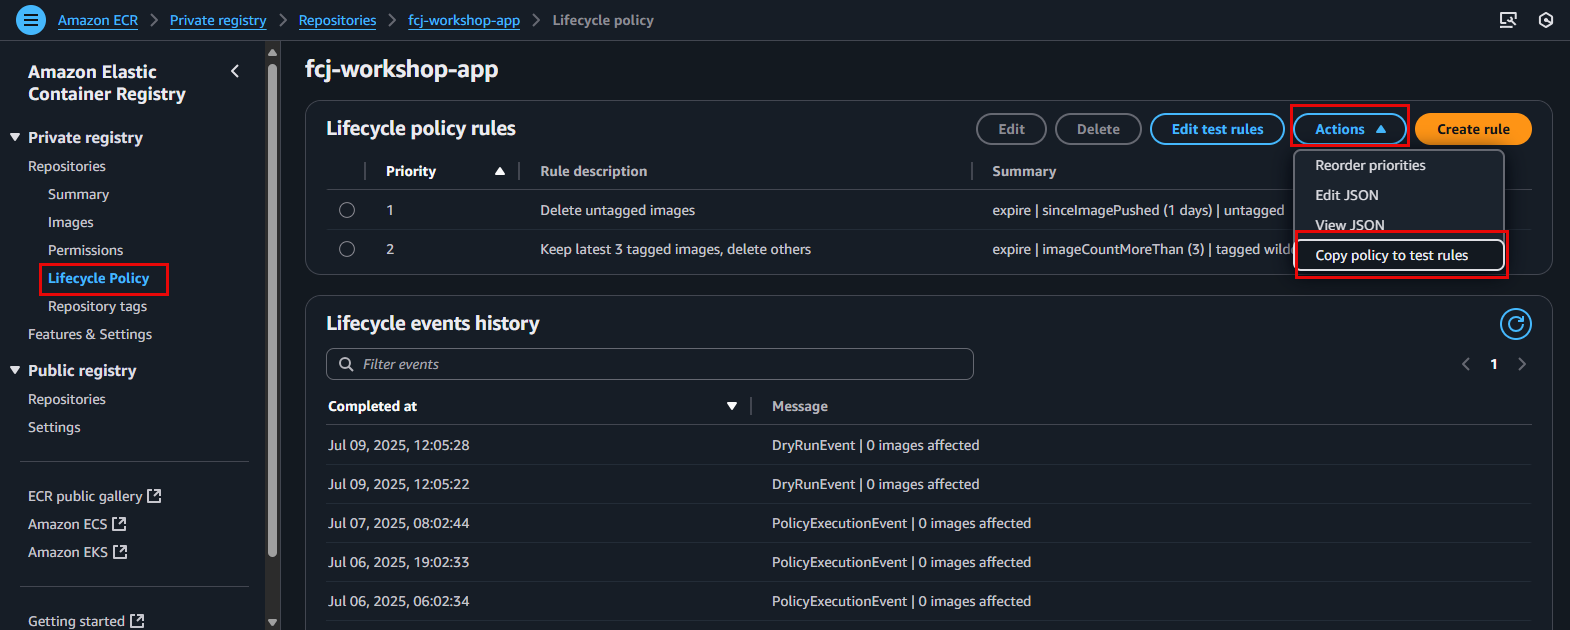
- Go back to your ECR repository and select Lifecycle Policy.
- Choose Actions.
- Select copy policy to test rules.
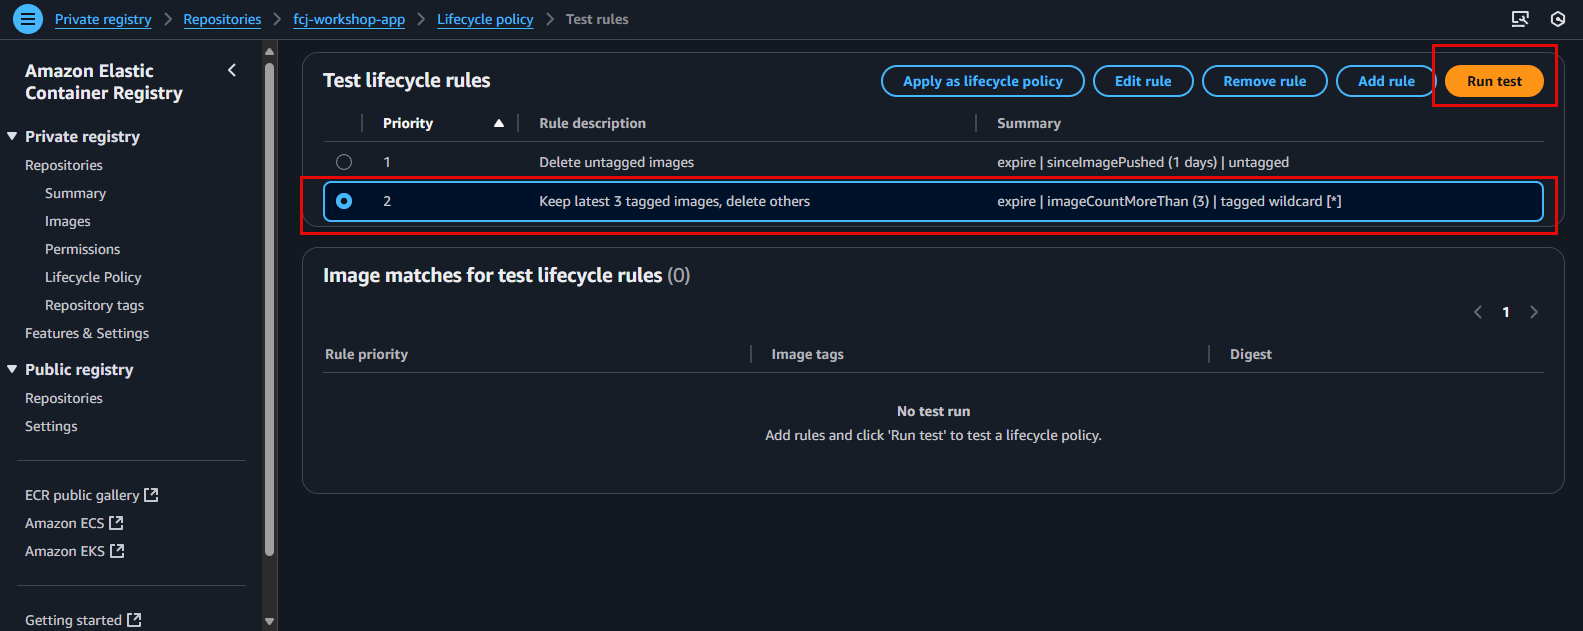
Select the rule you want to test run:
- Choose run test.
- Choose run test.
Check the test run:
Implementing a lifecycle policy helps automate the cleanup process, ensuring that your ECR repository is always optimized and contains only the necessary images.